Before we start this tutorial on how to create a Facebook business page perhaps the first question to ask is, “Why would you want to?” This question ultimately should be answered in the context of your business plan, what your marketing buyer persona (your ideal customer) looks like (including where they spend their time online), and how you can most effectively reach that buyer persona with your branded message. From a raw numbers perspective though, it’s pretty hard to argue against creating a digital presence for your business on Facebook…
Facebook, LinkedIn, or Twitter Business Page?
…or Pinterest, Instagram, Google+ or, or, or??? So there are a lot of them to consider. If you could only choose one right now (and you can always move into other social media platforms later) Facebook makes a lot of sense as a starting point. “Why is that?” you might ask, “I always thought Facebook was more idle fluff and less of a valid outlet for a serious business to get their message across.”
The Numbers
The simple truth of the matter is that Facebook is handily dominating the field. According to a Pew Research Center study, as of 2016, 79% of adult internet users use Facebook. Here’s how the numbers compare with other platforms based on the same study:
Percentage of Adult Internet Users’ Social Media Breakdown:
- Facebook: 79%
- Instagram: 32%
- Pinterest: 31%
- LinkedIn: 29%
- Twitter: 24%
Clearly you can get the most reach for your social marketing efforts with Facebook. This doesn’t mean you should avoid the other platforms, but Facebook makes the most sense as a place to start.
Step 1 – Where to Start
There are two ways to go about creating your new Facebook business page. The first, and most common method, is to create it from within your personal Facebook account. This is the method we’ll be going through in this guide.
The second way is to create it through Facebook Business Manager (read more about that here). The Manager lets you control multiple business assets (pages, ad accounts, and people who have assigned roles) from a single location. While this is beyond the scope of this post, if it is something you are interested in, the fine people at Social Media Examiner have a great guide here on how to setup and use Facebook Business Manager. Also, you can always go back and create a Manager account and add your business page to it at a later point.

Step 2 – Creating Your Page
Click on the URL below to begin creating your business page on Facebook:
https://www.facebook.com/pages/create.php
You’ll first need to choose what type of business page you will be creating.
At the time of this writing, Facebook offered the following 6 page types:
- Local Business or Place
- Company, Organization, or Institutions
- Brand or Product
- Artist, Band, or Public Figure
- Entertainment
- Cause or Community
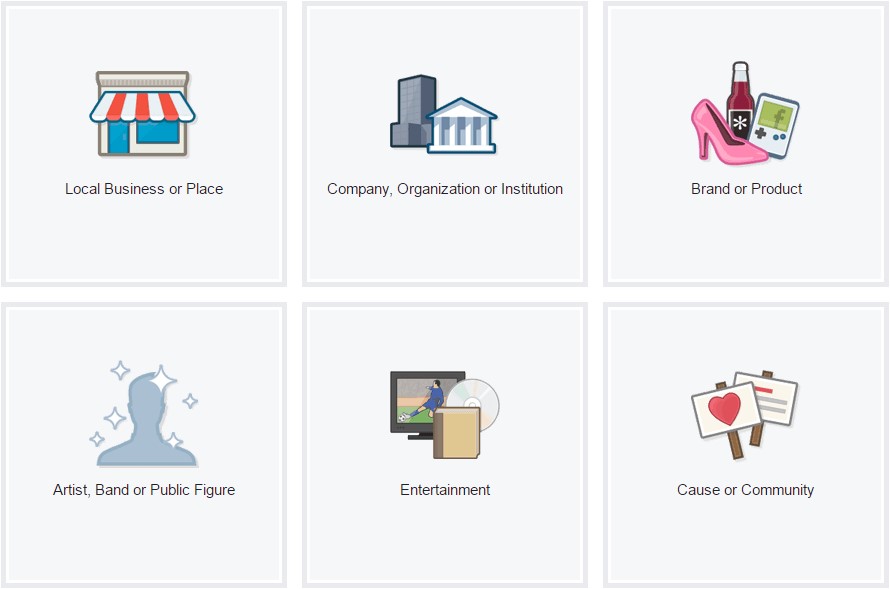
If you aren’t sure which page type would be best for your business click here for a guide that gives a detailed description of each one. You can always go back and change the type later if needed.
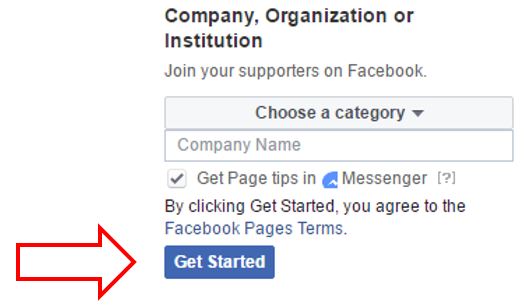
Next, you will need to pick a category that best describes your business and then type in your business’s name. Once you have done that, click the “Get Started” button as illustrated below.
Step 3 – Filling in the Important Details
Now it is time to get specific by filling in the details describing your business. Click “About” on the column on the left.
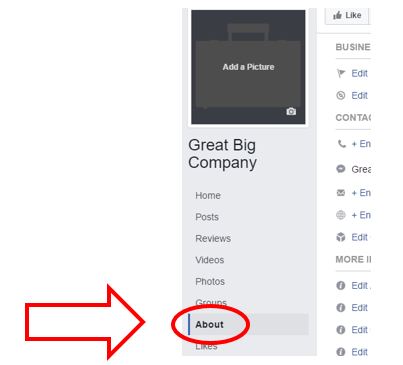
Then click each section to the right and fill in all the specifics that are relevant to you and your business. None of these are required but make sure to complete these sections as thoroughly as you are able. You don’t want your business losing credibility by having things partially finished. Show your current and prospective customers that you care about them and that you care about the value your business offering can provide for them – put the effort in and let your extra effort be reflected in your business’s online presence.
Step 4 – Adding Your Images
Now it is time to add your profile and cover photos. Make sure to choose images that represent your branding intentions well. Don’t choose images that are low quality or blurry.
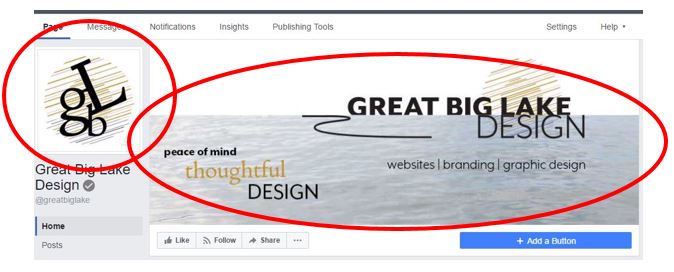
The smaller box on the left (as shown above) is where your profile image will go and the larger rectangular section to the right is for your cover photo.
Choosing the best image sizes for these sections can often be a moving target as Facebook is continually tweaking their layouts.
Here are the current recommended image sizes:
| Image Type | Minimum | Optimal |
|---|---|---|
| Profile Picture | 170 x 170 pixels | 340 x 340 pixels |
| Cover Photo | 399 x 150 pixels | 1200 x 675 pixels |
Click “Add a Picture” inside the profile box and upload your image.
Next click “Add a Cover” inside of the cover photo box and upload your second image.
Click here for a Social Media Cheat Sheet created by Louise Myers for the most current size recommendations (not just for Facebook).
Step 5 – Verifying Your Business Page with Facebook
An important step that is often missed when creating a business page is to have Facebook verify the authenticity of your business. This simple step will help add credibility to your page, giving your audience the peace of mind of knowing that you and your business are who you say you are.
Click on the “Settings” section on the upper right side of your business page.

Click “Edit” on the “Page Verification” line and follow the instructions.
Just enter your business phone number that you have listed in the “About” section of your page in the text box and click “Call Me Now.” You will then get an automated phone call with a verification code. You can also have Facebook verify your page by uploading a scanned image or photo of an official document showing your business name and address.

Once your business page is verified you’ll see a gray check mark next to your business name.
Conclusion
As mentioned at the beginning, 79% of adults using the internet are on Facebook. That is roughly 1.86 billion monthly active users. By creating a Facebook business page, you have been given (yes given – as in for free) an outlet to tap into that massive user base. It’s pretty hard to argue against that. Another upside to all of this is that once you’ve finished creating your Facebook business page you will have already done much of the ground work for creating a LinkedIn Company page and a Twitter Business page. Stay tuned as more step by step guides for each will be coming soon.